BeamNG.drive is a superbly anarchic crash-em-up with excellent driving physics. And with recent improvements to its career mode, it’s set to have the single-player experience it truly deserves.
However, there’s another aspect of BeamNG.drive that has improved greatly since the game’s introduction to Steam Early Access in 2015…
BeamNG.drive’s photo mode has come on leaps and bounds over the years, so we felt now was a great time to explain how to get the most from it, showing you how to capture your bonnet-crunchingly awesome crashes in all their glory.
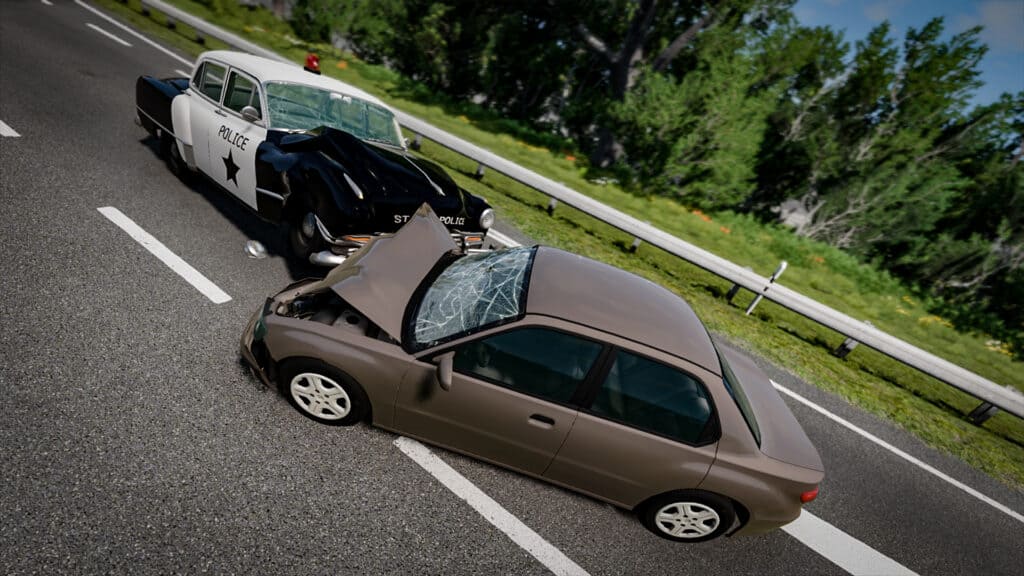
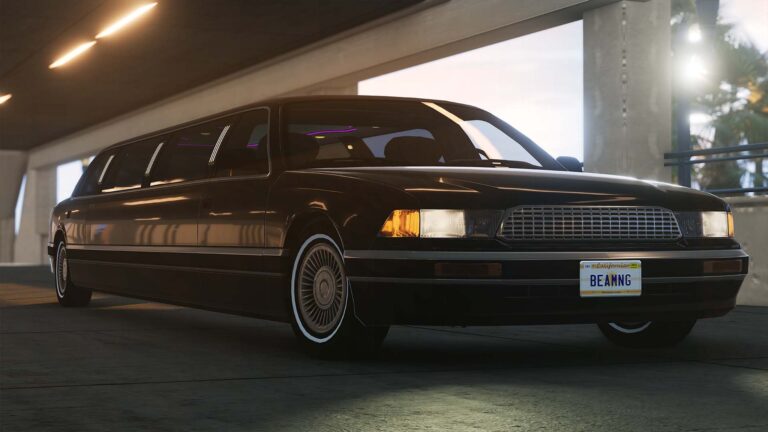
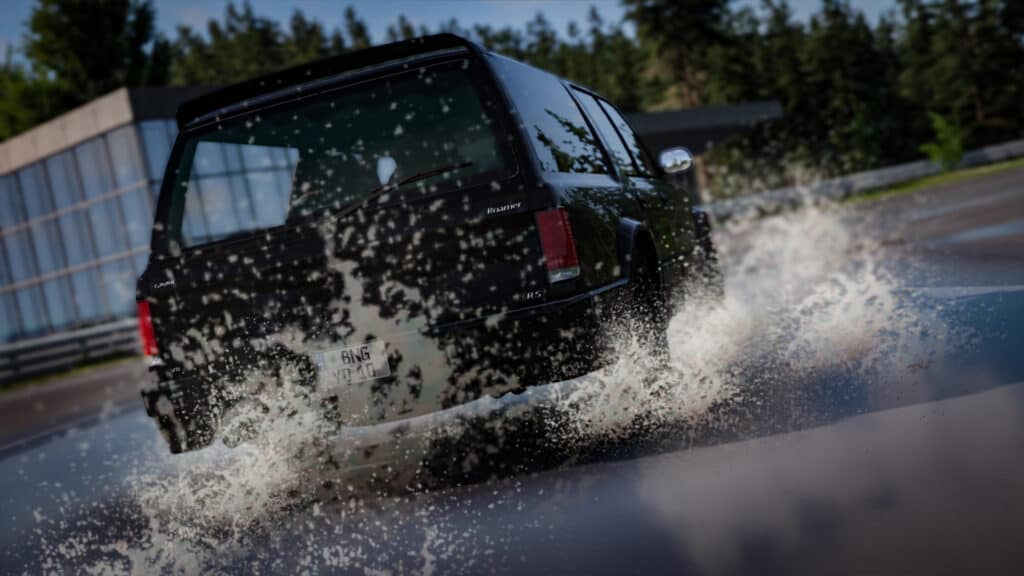
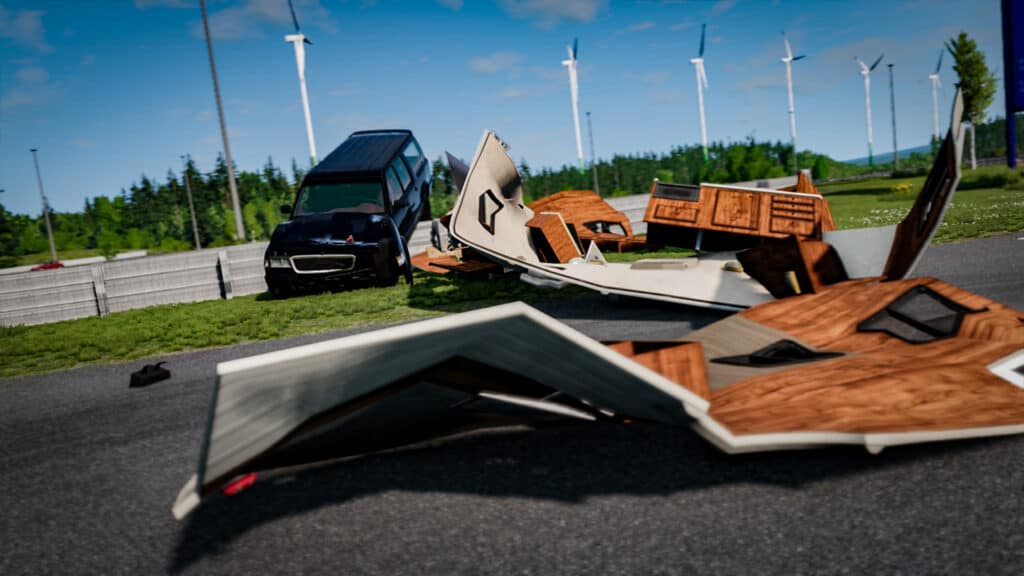
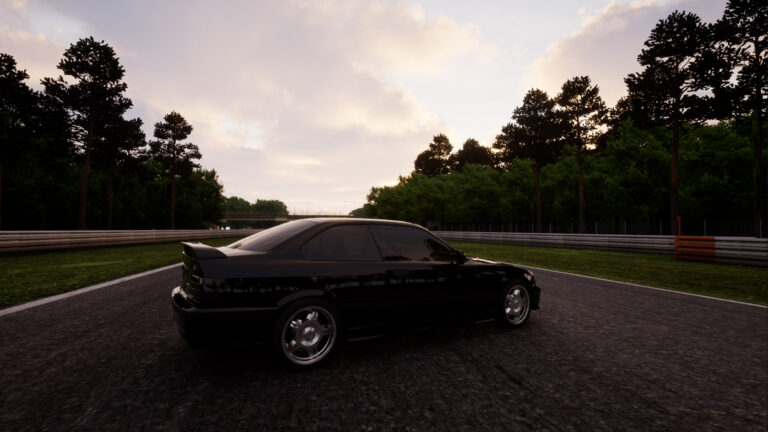
I fought the law, the law won
Step one: set graphics to 11
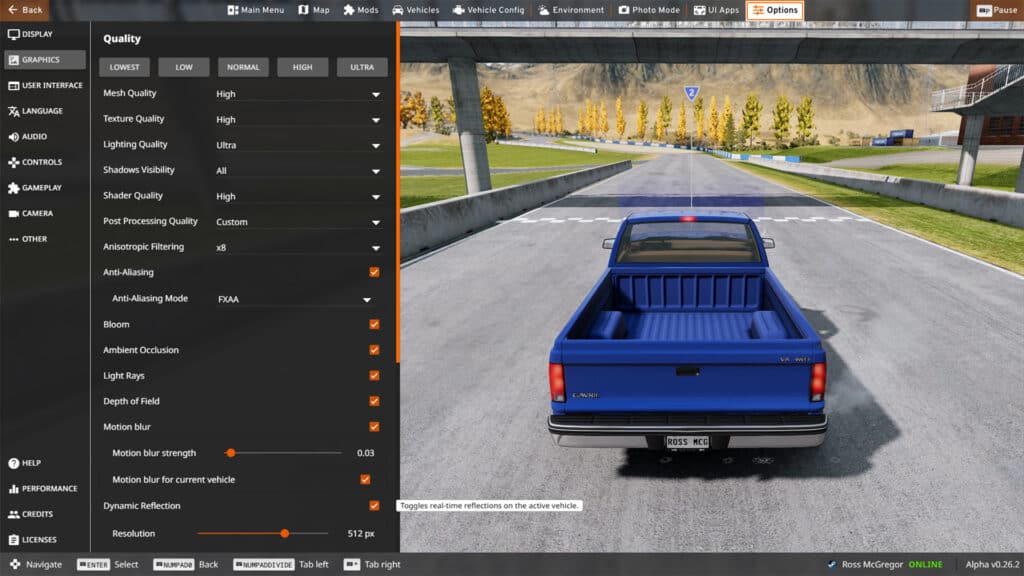
It’s safe to say that BeamNG.drive is one of the most resource-intensive driving experiences on PC these days. Therefore, setting the game up to look pretty in photo mode is a fine balancing act between maximising graphics detail and preventing complete PC combustion.
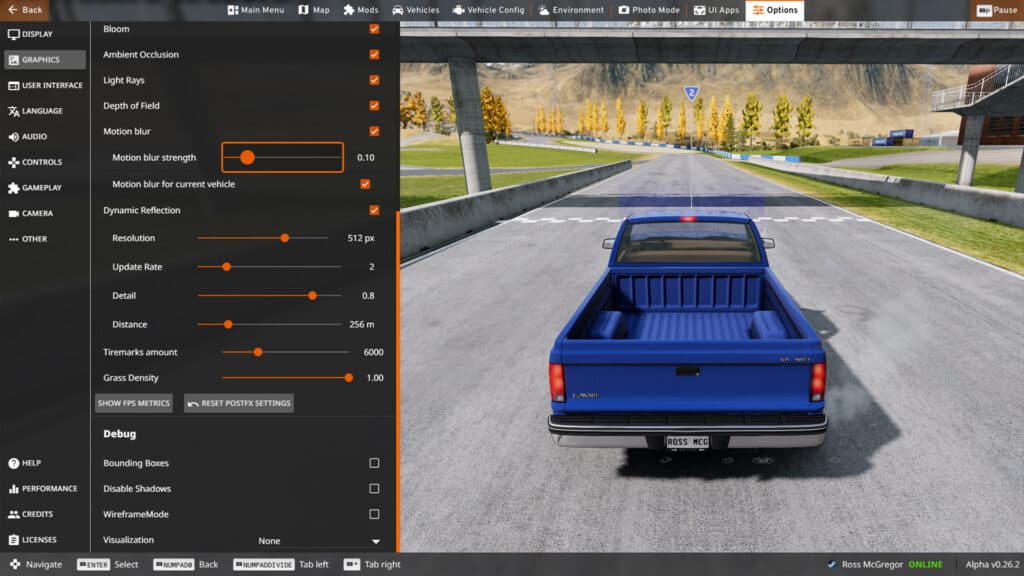
For the finest-looking photos you must enable depth of field. This will allow your photos have a neat blur effect in the foreground and background (to simulate the aperture setting on a camera), with a slider to determine the focus point.
The basic rule of thumb is to set the graphics as high as possible without making the game an unplayable mess. As a small tip to improve performance, aim to cut down on grass density, reflections and shadow visibility settings. These are notoriously resource-hungry options.
Accessing the photo mode in BeamNG.drive
The good news is photo mode can be used at any point during gameplay in BeamNG.drive. However, the best way to set up a photo opportunity is to play the game as you normally would, recording your gameplay by mapping a key to the Start/stop recording function (accessed via Options – Controls – Replay menus).
Start recording, drive around, perform a stunt or destroy a caravan. Or, you can position your car in a scenic location. Save the replay when you’re happy with your effort and you will be able to access it again via BeamNG’s main menu.
To get into photo mode, hit escape during gameplay (or replay playback). Assigning a pause key will also help freeze the on-screen action. BeamNG’s top menu will now appear, as well as the main option wheel in the centre of the screen. Photo mode is displayed clearly at the top. Click on this to make the photo mode menu appear.
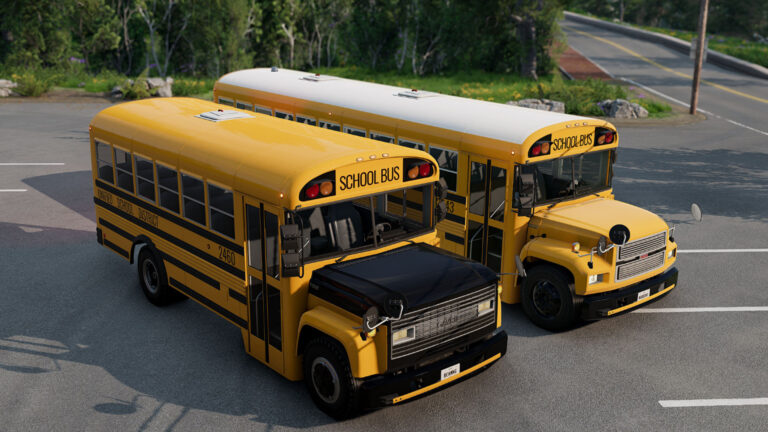
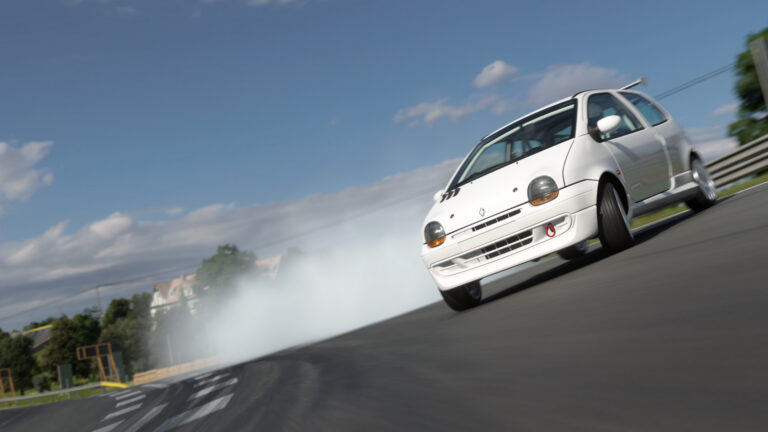
Skid pan action
A guide to using BeamNG.drive’s photo mode
There are several options in terms of setting up your photo. The first step is to position your virtual camera until you get a desirable angle. Perhaps there’s a leafy bit of scenery you’d like to showcase or an architecturally interesting building? Or maybe you just want a prime view of your prop shaft perpendicularly departing your transmission?
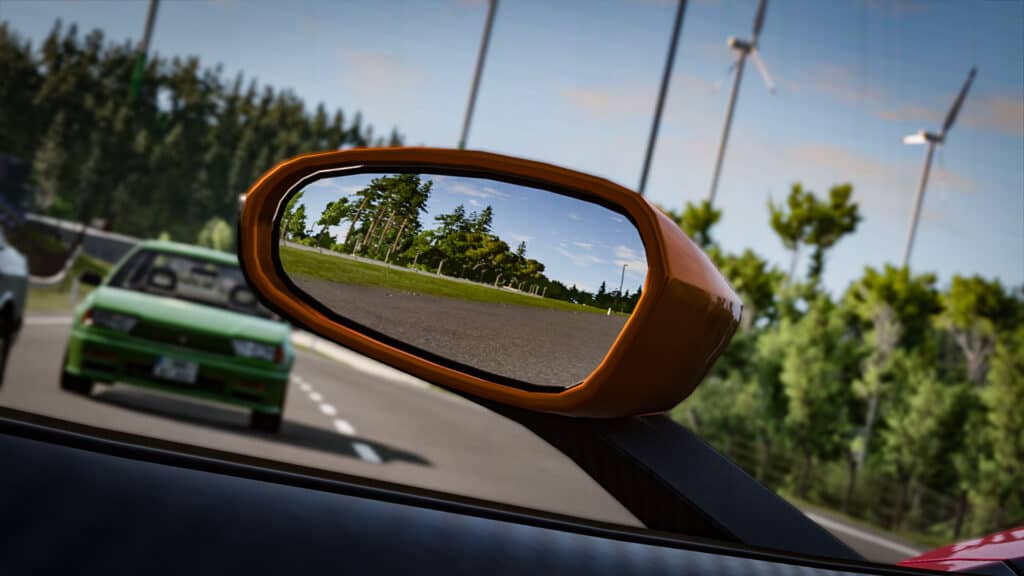
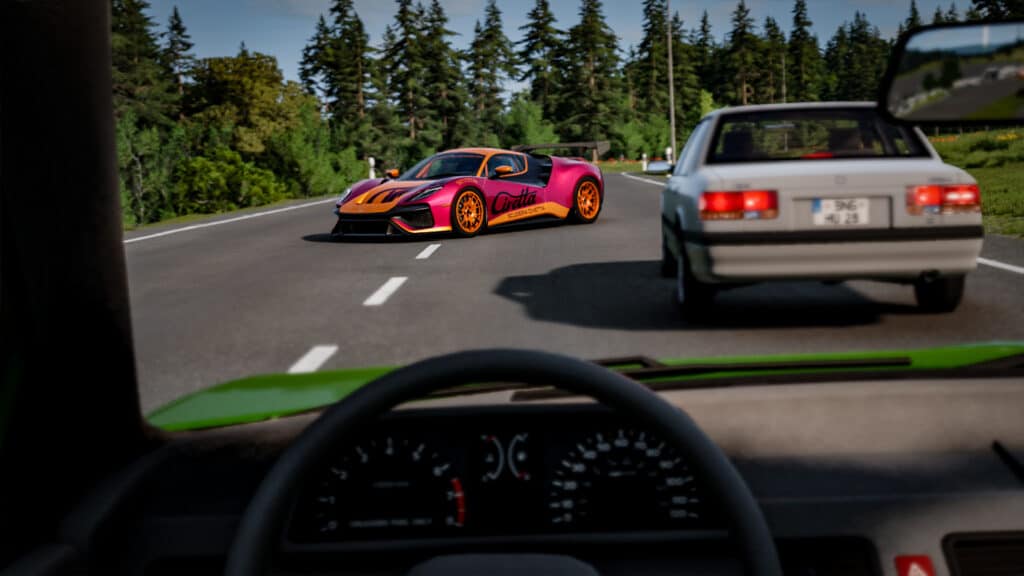
Ok, the reflected image isn’t the best but it does highlight BeamNG’s stereoscopic wing mirrors!
Either way, move the camera forwards, backwards and sideways using W, A, S and D keys, while right-clicking and moving the mouse will adjust your point-of-view.
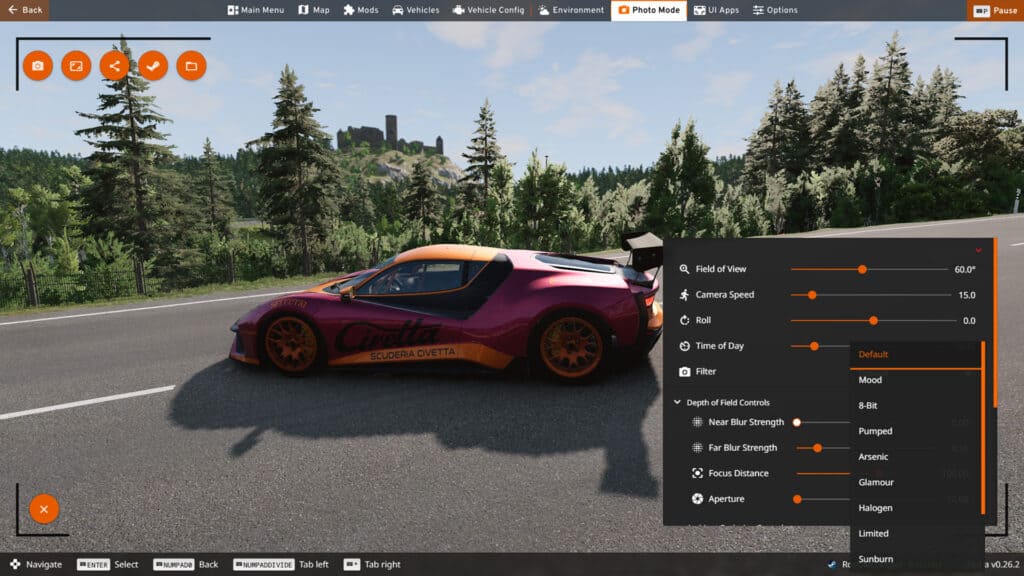
Your initial set of photo mode options includes Field of View, Camera Speed, Roll, Time of Day and Filter. If you’ve just set the position of your virtual camera, the ‘Field of View’ slider changes the amount of zoom.
In real-world photography, using a telephoto lens in this manner can enhance the background blur of an image, but the effect is less pronounced in BeamNG.
‘Camera Speed’ changes how quickly the camera moves via the W, A, S and D keys, making it more controllable, while ‘Roll’ refers to the tilt of the camera. Sometimes adding Roll to the image will make the subject appear more dynamic so it’s worth experimenting with.
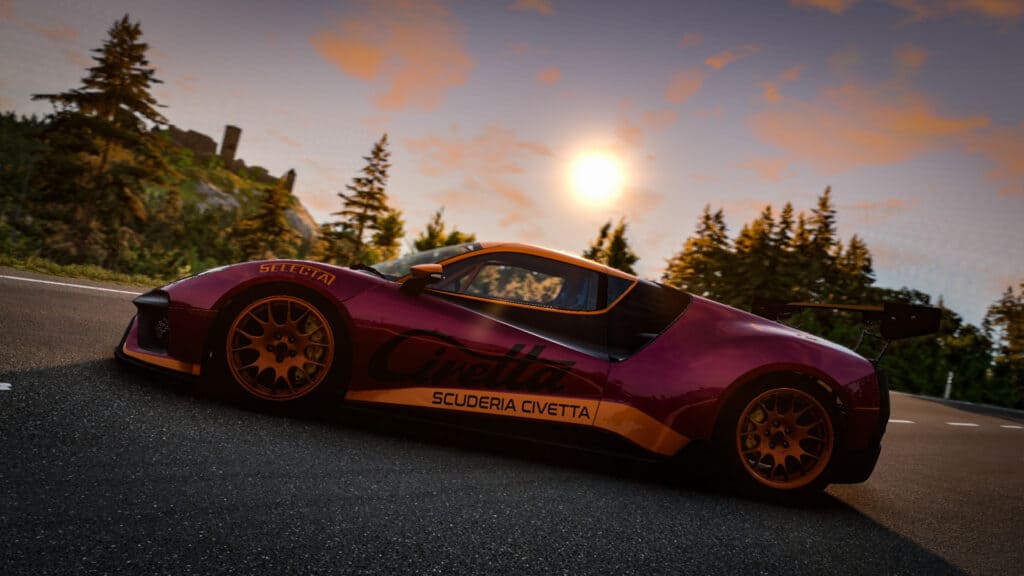
‘Time of Day’ is a neat feature that lets players choose the exact lighting conditions for their image. Choosing a time around the golden hour at sunset or sunrise is normally the most atmospheric but perhaps you’d like to take a moody night-time shot or have the maximum amount of sunlight in the middle of the day?
The last option is ‘Filter’ and this applies a series of pre-determined filters over your image. Honestly, I wouldn’t bother with these at all, I couldn’t find any that enhanced the overall photo.
The Filter options aren’t very good. Avoid.
Depth of field
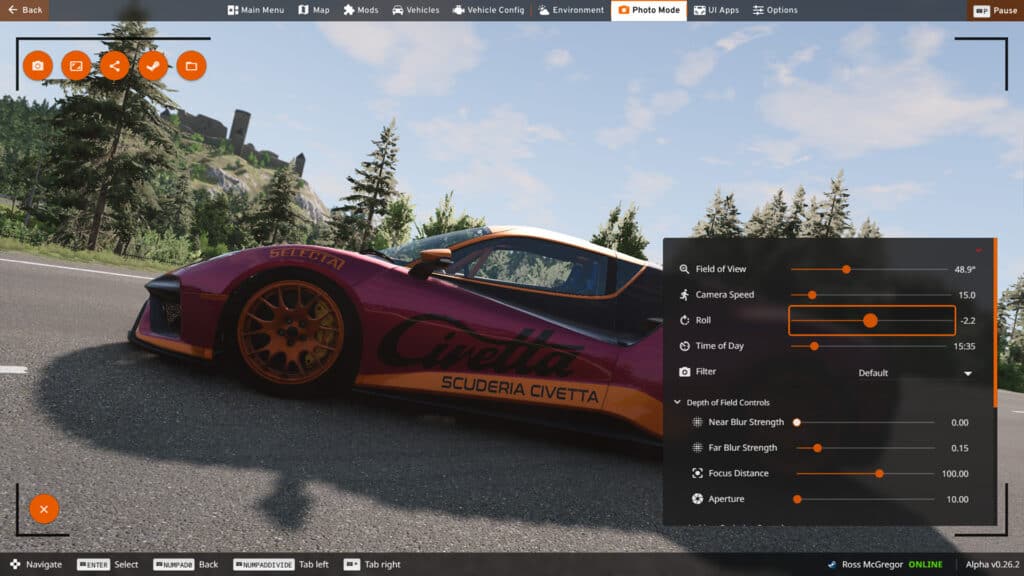
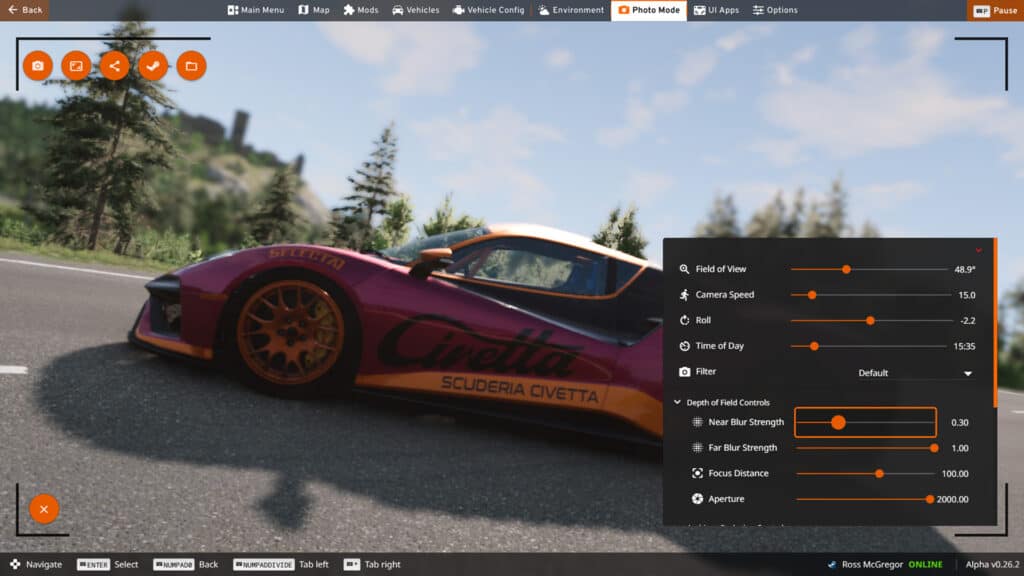
This is where we get into the nitty-gritty. BeamNG’s Depth of Field Controls are split into four options: Near Blur Strength, Far Blur Strength, Focus Distance and Aperture.
‘Near Blur Strength’ increases or decreases the amount of blur in the foreground of the image; ‘Far Blur Strength’ does the same for the background; ‘Focus Distance’ sets a focal point and ‘Aperture’ controls the overall amount of blur you’ll see when changing Near or Far Blur Strength (for more information on aperture, consult our Gran Turismo 7 photo mode guide, as I go into a lot more nerdy detail here).
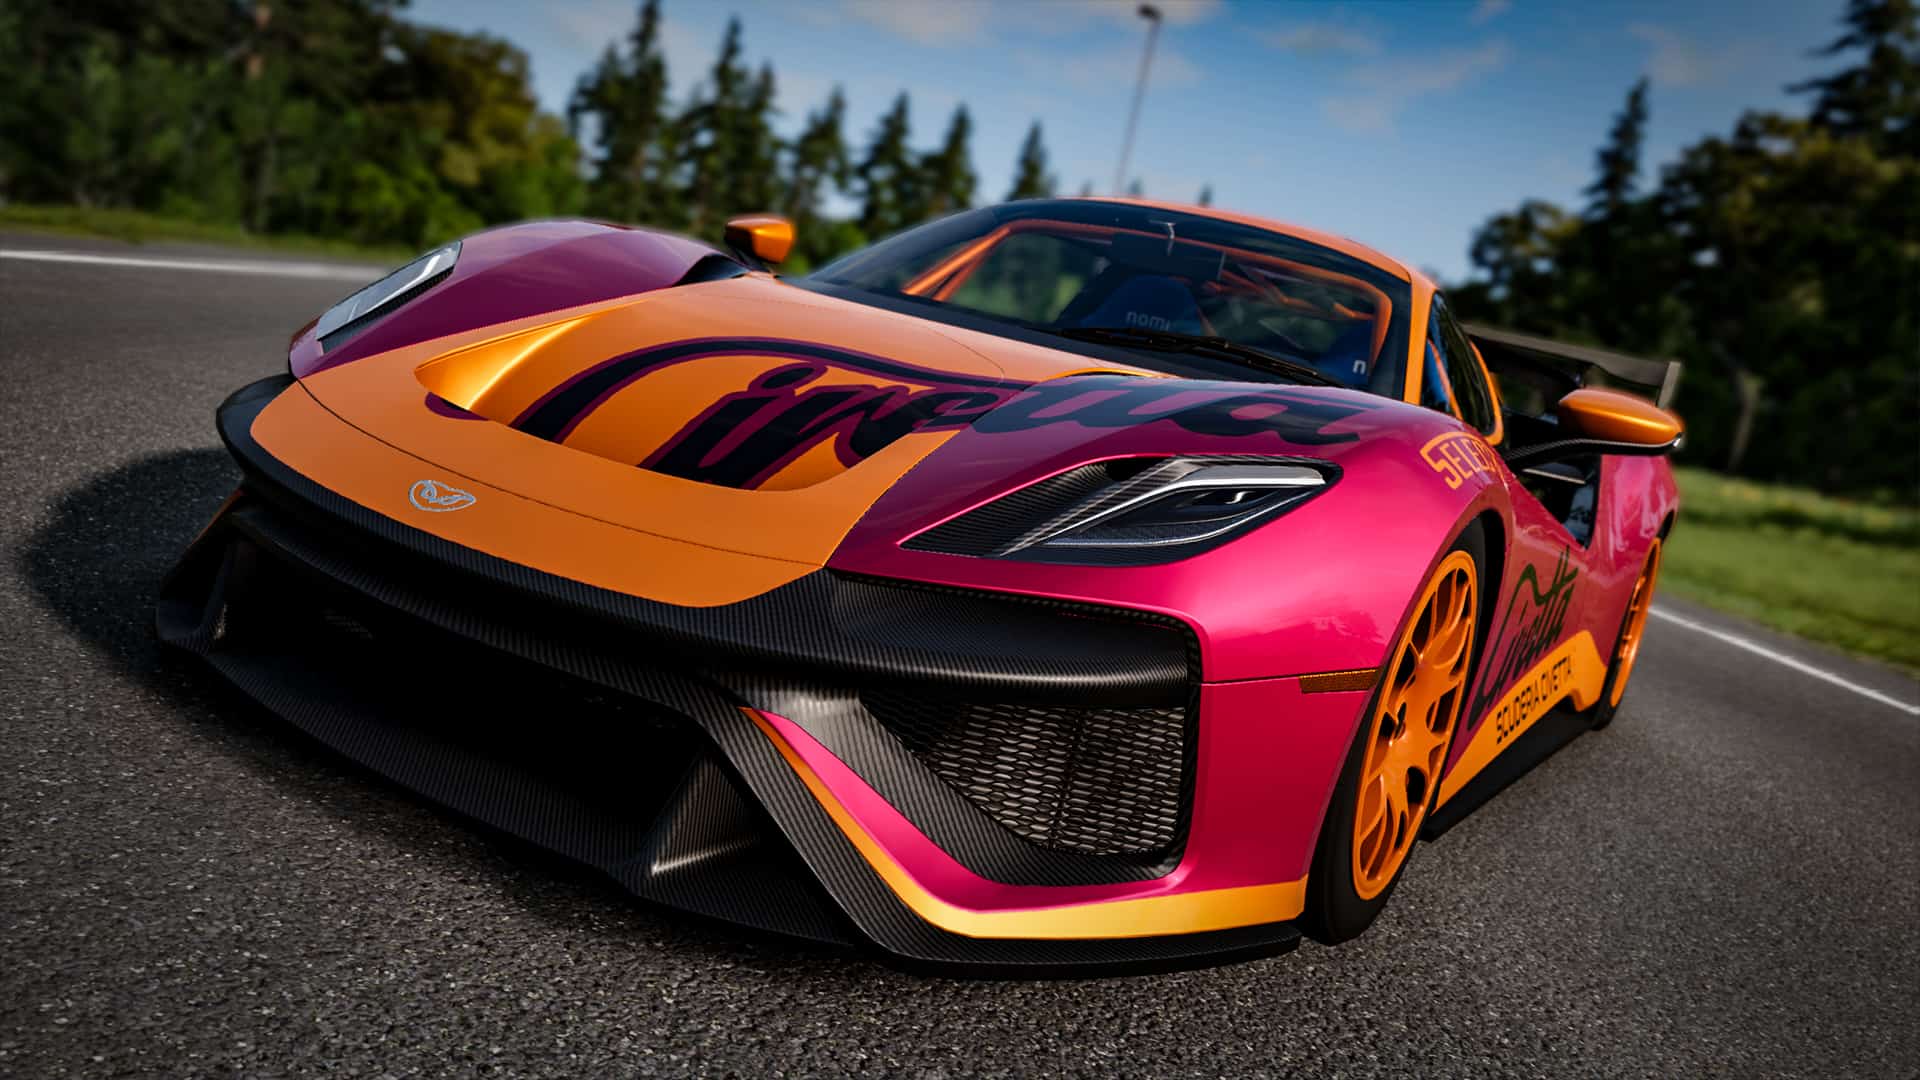
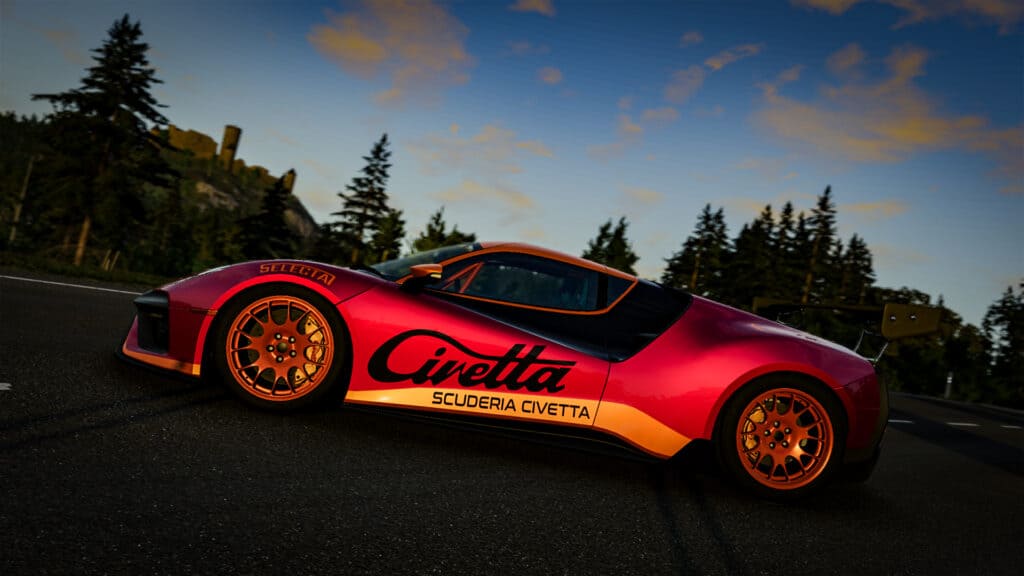
The key to setting up Depth of Field in BeamNG’s photo mode is striking a balance between all these options. In this example, I’ve set Near Blur Strength to 0.3.
As you can see, the subject – the lovely Civetta Scintilla racecar – is a little out of focus, while the background is heavily blurred as the Aperture setting is at its maximum (perhaps too blurred if I’m being honest).
Now, to get the car in focus we can adjust the Focus Distance setting to sharpen things up, as we can see below:
Reducing the focus distance sharpens the car up towards the foreground
Ambient Occlusion
The ‘Ambient Occlusion’ sub-menu is less important than Depth of Field’s. For best results, however, set its ‘Quality’ slider to Maximum. Ambient occlusion is a feature that enhances the way light hits objects in the scene and how their shadows form. The effect isn’t too pronounced in BeamNG.drive but it does add a little more subtlety to the look of three-dimensional objects.
Adding more ‘Contrast’ to a particularly well-lit image will help bring out more detail in the subject, while increasing the ‘Radius’ setting will maximise the effect of Contrast.
Other options
At the bottom of BeamNG’s photo mode menu, there are several checkboxes for other options (shown in the above image). ‘Show Grid’ brings up an overlay to help centre your image, while the other options are mainly graphical enhancements.
To achieve the best quality image it’s advisable to check the rest of these boxes as they enable depth of field functions, reflections, smooth camera movement and screen space ambient occlusion effects (if your PC can handle the extra workload, that is).
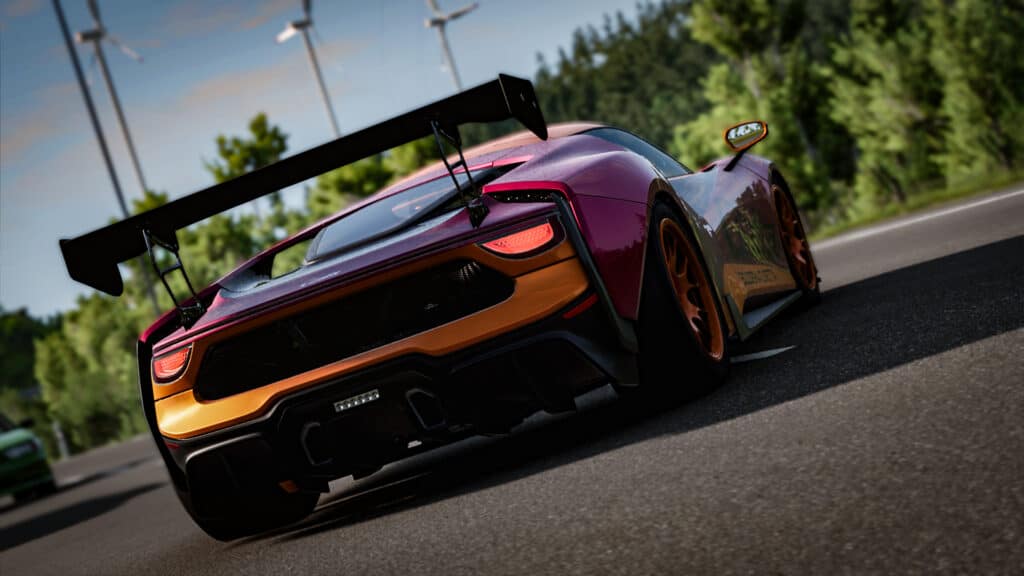
The Civetta looks great from every angle
Where are BeamNG.drive screenshots saved?
To take a photo, you can click the camera icon at the top left of the screen. BeamNG also allows you to take a better quality image using the icon second from the left. The saved images can be found here: C:\Users\Username\Documents\BeamNG. Drive\screenshots.
Alternatively, clicking the icon fourth from the left allows Steam to grab a screenshot and saves it in your designated Steam screenshot folder. Remember to allow Steam to save these as PNGs for the best result! (Information on how to do this can be found in our Assetto Corsa Competizione CinemaHUD guide).
You can also share your photo on BeamNG.com and access your screenshot folder directly, using the middle and far right icons respectively.
“You can’t park there mate”
Taking good quality photos in BeamNG.drive is much easier now than it has ever been. The key point is to set the graphics settings as high as possible (depth of field is a must) and use as much of the game’s photo mode bells and whistles to enhance the overall image.
Once done, apply a little Lightroom (or equivalent) editing* to really make the image pop. Or how about changing the time of day to see what really works for your subject, like the three images below?
Do you enjoy using BeamNG.drive’s photo mode? What are your top tips for taking the best photos? Let us know in the comments below.
One weakness of BeamNG’s photo mode, however, is the lack of motion blur. This feature was added to the game in its v0.26 update but hasn’t crossed over into photo mode yet.


Discussion
1 Comment
Join the discussion
Join Traxion.gg to start discussing with members.
Already a member? Sign in
Beam NG Drive (paHhNN Aoctyn)